Trailblazer’s Guide: Unforgettable Hikes & Hidden Gems Near Pinecrest
There’s a special kind of freedom that comes from lacing up your boots, tightening your pack, and stepping onto a dirt path that disappears into the trees. Whether you’re a first‑time hiker or a summit‑chasing veteran, the mountains around Pinecrest and the greater Sierra region offer a playground of granite peaks, mirror‑still lakes, and quiet forest trails where the only traffic is wind through the pines. This guide blends classic favorites, under‑the‑radar hikes, smart packing strategies, and sample itineraries so you can turn a casual walk into a full‑blown adventure story.
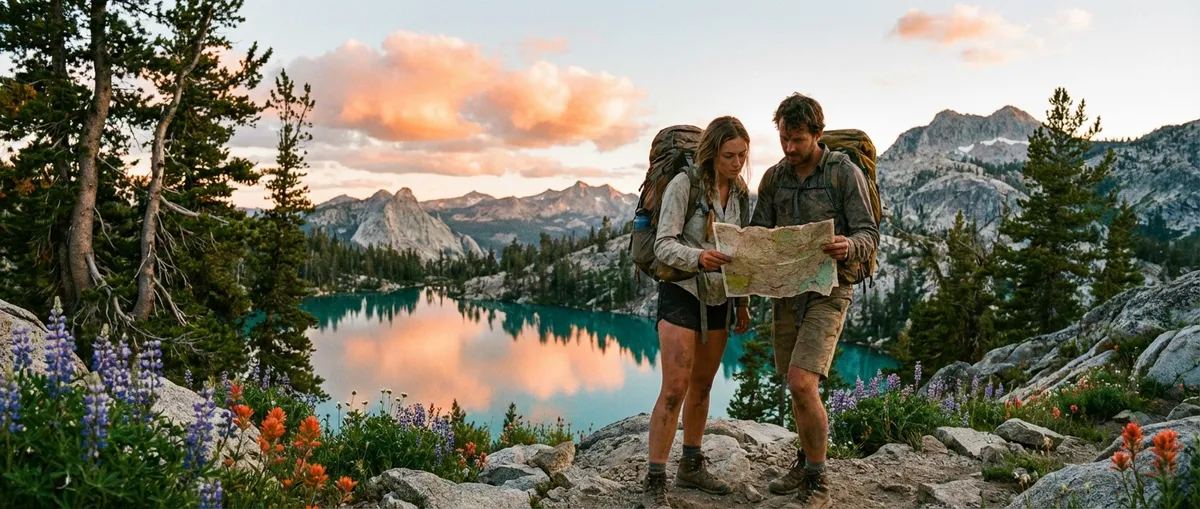
Essential Trail Experiences: From Lakeside Strolls to High‑Country Ridges
For newcomers or families, start with mellow, high‑reward routes that deliver scenery without punishing elevation. Lakeside loops and creekside paths are perfect for acclimating to altitude and dialing in your gear. Look for well‑marked, popular trails for your first outings—these usually have clear signage, easier terrain, and more fellow hikers if you need help or directions. Aim for hikes under 5 miles roundtrip with less than 800 feet of elevation gain while you’re building stamina.
More experienced hikers can push deeper into the backcountry, chasing sweeping vistas, granite ridgelines, and alpine basins. Choose trails that climb steadily rather than brutally—long switchbacks through forest and meadows often feel easier than steep, rocky scrambles. Prioritize routes that feature multiple payoffs along the way—waterfalls, viewpoints, wildflower meadows—so the journey feels as rewarding as the destination. If you’re comfortable with navigation and changing mountain weather, consider linking two or three trails into loop routes or partial thru‑hikes that give a sense of movement through the landscape rather than an out‑and‑back.
No matter your level, plan your hike around natural “anchors”: sunrise or sunset vistas, a lakeside lunch spot, or a final viewpoint where you’ll turn around. This helps you manage time, conserve energy for the way back, and avoid the classic mistake of wandering “just a little farther” until daylight starts to fade. Always check recent trail reports and closures before you go; conditions can change quickly with snow, fire, or storm damage.
Hidden Gem Trails Worth the Detour
The most memorable hikes are often the ones that don’t make top‑10 lists—but linger in your memory because of some small magic: a quiet cove, an unmarked viewpoint, a creek where you never see another soul. These hidden gems usually sit just beyond the radius of casual day‑trippers or require a bit of map‑reading to piece together.
Seek out spur trails that leave from popular trailheads but quickly peel away into less‑visited terrain. Often, a side path heading to a smaller unnamed lake or a minor peak will be half as crowded as the main route but just as scenic. Scout satellite imagery and topographic maps before your trip; you’ll often spot small tarns, meadows, or ridges that don’t get big billing in guidebooks but can be reached via faint side trails or cross‑country scrambles suitable for confident hikers.
Another strategy: chase features rather than famous names. Search for “waterfall,” “overlook,” or “vista” in local hiking resources and apps, then sort by least‑reviewed or lesser‑known locations. Many of these spots involve short but steep hikes that deter the casual crowd, rewarding you with solitude and wildness. Just remember that “hidden” doesn’t mean unregulated—respect signage, closed areas, and private land boundaries. When you find a special place, protect its character by practicing strict Leave No Trace: pack out every scrap, stay on durable surfaces, and resist geotagging extremely sensitive locations on social media.
To discover your own favorites, build a habit of exploring shoulder areas—trails that start near popular lakes and campgrounds but immediately branch into national forest or wilderness zones. Talk to local rangers and shop owners; they’ll rarely give away their deepest secrets, but they will point you toward quieter corners that match your fitness level and time window.
Smart Packing: Trail‑Ready from Half‑Day Hikes to Overnight Treks
Packing well is the difference between a joyful wander and a sufferfest. Start with the Ten Essentials—navigation, headlamp, sun protection, first aid, knife/multi‑tool, fire, shelter, extra food, extra water, and extra clothing—then scale up or down based on the length and remoteness of your hike. Even for short outings, treat your pack like insurance; you may never need that emergency layer or backup snacks, but you’ll be grateful if a twisted ankle or missed turn extends your day.
For day hikes, a 15–25 liter backpack usually does the trick. Pack a hydration bladder or two water bottles, a lightweight wind/rain shell, sun hat, sunglasses, and a warm layer—even summer days can cool rapidly in the mountains. Add a compact first‑aid kit (with blister care), a small headlamp (with fresh batteries), a map or offline GPS app, and two more snacks than you think you’ll need. Choose sturdy, broken‑in footwear with good traction; trail runners are great for well‑maintained paths, while boots shine on rocky, uneven, or snowy terrain.
If you’re stepping into overnight or multi‑day territory, focus on balancing comfort and weight. A 40–60 liter pack will carry a compact tent or tarp shelter, sleeping bag matched to the expected low temperatures, sleeping pad, stove, fuel, and food. Plan meals that are high‑calorie but low‑bulk—dehydrated meals, instant grains, nut butters, hard cheese, tortillas, and trail mix are classics for a reason. Use bear‑resistant canisters or proper food‑hanging techniques where required; many mountain regions mandate this both for your safety and wildlife protection.
For every outing, perform a quick “trail check” at the car: Do you have water, layers, navigation, light, and a way to handle minor injuries? Let someone know your route and return time. Snap a photo of the trailhead map, then stash your phone in airplane mode to preserve battery for navigation and emergencies. Pack thoughtfully and you’ll move lighter, farther, and with more confidence.
Itinerary Ideas: Build Your Own Mountain Escape
Designing a great hiking trip is like crafting a story—good pacing, rising action, and a satisfying finale. Think in arcs: warm‑up, challenge, recovery. This structure helps whether you’ve got a single day or a long weekend to play with.
**One‑Day Escape**
- **Morning:** Start early with an easy‑to‑moderate lakeside or river trail, giving your legs time to warm up while temperatures are cooler. Aim for 4–7 miles total, finishing by late morning.
- **Midday:** Refuel at a scenic picnic spot—shoreline rocks, a viewpoint bench, or a shady meadow. Use this time to dry out socks, reapply sunscreen, and check in with how everyone is feeling.
- **Afternoon:** If energy remains, add a short, steep viewpoint hike—something 1–3 miles with a solid payoff. If not, wander a nature trail or interpretive loop near the trailhead to learn about local geology, plants, and history.
**Weekend Peak & Lake Combo**
- **Day 1:** Arrive by late morning and tackle a moderate trail with rolling terrain, ending at a small lake or overlook. This is your acclimation day; keep distance reasonable and elevation gain modest.
- **Evening:** Camp nearby or stay in a lodge. Prep gear, pack a summit or ridgeline daypack for tomorrow, and go to bed early.
- **Day 2:** Start before sunrise for a bigger objective—a high pass, peak, or remote lake. Plan your turnaround time based on the slowest hiker, weather forecasts, and daylight. Celebrate with a relaxed post‑hike swim, stretch session, or lakeside dinner.
**Three‑Day Explorer Circuit**
- **Day 1:** Hike into a basecamp location a few miles from the trailhead, ideally near water. Set up camp early, explore a short side trail, and get familiar with the area.
- **Day 2:** Leave non‑essentials at camp and do a long loop or out‑and‑back to a high‑reward destination: a remote lake chain, waterfall, or panoramic ridge. Return to the same camp for a stress‑free evening.
- **Day 3:** Pack up and exit via a different trail if possible, creating your own little circuit. Stop often to savor the landscape—once you’re back at the car, the wild quiet will vanish quickly.
Always build in margins: an extra hour for breaks, a backup trail in case of weather or closures, and an easier option if someone’s knees or lungs protest. Hiking trips are most enjoyable when ambition and realism meet in the middle.
Safety, Seasons, and Trail Etiquette
Mountain trails are beautiful but uncompromising. Weather can flip from blue skies to hail in minutes; snowfields can linger well into summer; and stream crossings swell after storms or snowmelt. Check weather forecasts from both the nearest town and higher‑elevation stations—temperatures, wind, and storms can differ dramatically only a few miles apart. In shoulder seasons, call ranger stations or check park websites for avalanche advisories, lingering snow, and trail washouts.
On the trail, follow simple etiquette to keep the experience wild and welcoming. Uphill hikers generally have the right‑of‑way, and horses or pack animals always come first—step off the trail on the downhill side and wait quietly. Keep voices low; sound carries far in valleys and around lakes. If you play music, use headphones rather than speakers so wildlife and other hikers can enjoy natural soundscapes. Yield to faster groups behind you by stepping aside at wider sections of trail.
Leave No Trace is more than a slogan—it's how you help keep these places worth returning to. Pack out all trash, including food scraps and tissue. Stay on established trails to prevent erosion and habitat damage, even if a shortcut looks tempting. Use established campsites at least 200 feet from lakes and streams when backcountry camping, and dispose of human waste properly using catholes or designated facilities. For social media, be thoughtful: share the beauty, but avoid pin‑pointing extremely fragile or overburdened locations.
Respect the mountains, and they tend to meet you halfway: in the form of safe crossings, clear views, and that deep, satisfied tiredness that hits when you kick off your boots at the end of the day. With the right preparation, packing, and mindset, every hike near Pinecrest can feel less like an errand and more like an expedition.
Conclusion
Every trail tells a story, and the mountains around Pinecrest are rich with chapters waiting to be written—quiet switchbacks in early morning light, surprise viewpoints that stop you mid‑stride, and lakes that mirror the sky so perfectly it feels like walking between worlds. By choosing routes that match your experience, packing smart, and venturing just beyond the obvious, you can turn even a short hike into a memory that pulls you back to the trailhead again and again. Plan well, tread lightly, and leave room for the unexpected; the best moments in the backcountry are often the ones you never saw coming.
Sources
- [National Park Service – Hiking Basics](https://www.nps.gov/subjects/trails/hiking-basics.htm) – Covers fundamental hiking preparation, safety, and planning guidance used by U.S. national parks
- [REI Co‑op – Ten Essentials of Hiking](https://www.rei.com/learn/expert-advice/ten-essentials.html) – Detailed breakdown of the Ten Essentials and how to adapt them for different types of hikes
- [Leave No Trace Center for Outdoor Ethics](https://lnt.org/why/7-principles/) – Explains the core Leave No Trace principles that guide responsible travel in the outdoors
- [U.S. Forest Service – Outdoor Safety Tips](https://www.fs.usda.gov/visit/know-before-you-go/safety) – Official safety recommendations for visiting and hiking in national forests
- [American Hiking Society – Trail Etiquette](https://americanhiking.org/resources/hiking-etiquette/) – Outlines widely accepted rules of the trail for hikers, runners, and multi‑use paths